Surgical
Unit and Handpiece
The surgical unit
includes the following:
Surgical micromotor. This is a simple machine
with quite satisfactory cutting ability. Technologically
advanced machines, which function with nitrous dioxide or electricity and have a much greater cutting ability than
the afore mentioned micromotor.
The surgical hand
piece is attached to the above unit, includes many types, and is manufactured
to suit the needs of oral surgery. Its advantages are as
follows:
·
It
functions at high speeds and has great cutting ability.
·
It does
not emit air into the surgical field.
·
Itmay be
sterilized in the autoclave.
·
The
handpiece may receive various cutting instruments.

Electric
surgical micromotor with adjustable speed

High-speed
surgical handpiece
Bone
Burs
The burs used for the
removal of bone are the round bur and fissure bur. A large bone bur similar to
an acrylic burmay be usedwhen the surgical procedure involves greater bone
surface area (torus) or smoothing of bone edges of the wound.
Scalpel
(Handle and Blade)
Handle. Themost commonly used handle in oral surgery is
the Bard–Parker no. 3. Its tip may receive different types of blades.
Blade. Blades are disposable and are of three
different types (nos. 11, 12, and 15). The most common type of blade is no. 15,
which is used for flaps and incisions on edentulous alveolar ridges. Blade no.
12 is indicated for incisions in the gingival sulcus and incisions posterior to
the teeth, especially in the maxillary tuberosity area. Blade no. 11 is used
for small incisions, such as those used for incising abscesses. The scalpel

Various types of
surgical burs

Scalpel and
various types of scalpel blades (nos. 11, 12, 15) commonly used in oral surgery

Correct way to
load the scalpel blade on the handle of the scalpel

Sliding of
scalpel blade, with the male portion of the fitting facing upward, with the aid
of a hemostat
blade is placed on the
handle with the help of a needle holder, or hemostat, with which it slides into
the slotted receiver with the beveled end parallel to that of the handle. The
scalpel is held in a pen grasp and its cutting edge faces the surface of the
skin or mucosa that is to be incised.

Scalpel is held
in a pen grasp
Periosteal
Elevator
This instrument has
many different types of end. The most commonly used periosteal elevator in
intraoral surgery is the no.9 Molt, which has two different ends: a pointed
end, used for elevating the interdental papillae of the gingiva, and a broad
end, which facilitates elevating the muco periosteum from the bone. The Freer
elevator is used for reflecting the gingiva surrounding the tooth before
extraction. This instrument is considered suitable, compared to standard
elevators, because it is easy to use and has thin anatomic ends. The elevator
may also be used for holding the flap after reflecting, facilitating
manipulations during the surgical procedure. The Seldin elevator is considered
most suitable for this purpose.
Hemostats
The hemostats used in
oral surgery are either straight or curved. The most commonly used hemostat is
the curved mosquito type or micro-Halsted hemostat, which has relatively small
and narrow beaks so that they may grasp the vessel and stop bleeding. Hemostats
may also be used for firmly holding soft tissue, facilitating manipulations for
its removal.

Various types of
periosteal elevators. a Seldin. b Freer. cNo. 9 Molt

Micro-Halsted
hemostats. a Straight. b Curved

Surgical
forceps. a Standard. b Adson tissue forceps

Anatomic
dissecting forceps. a Standard. b Adson dissecting forceps
Surgical
– Anatomic Forceps
Surgical forceps are
used for suturing the wound, firmly grasping the tissues while the needle is
passed. There are two types of forceps: the long standard surgical forceps,
used in posterior areas, and the small, narrow Adson forceps,used in anterior
areas.
The beak of the
forceps has a wedge-shaped projection or tooth onone side, and a receptor on
the other,which fit into each other when the handles are locked. This mechanism
allows the forceps to grasp the soft tissues found between the beaks very
tightly. Anatomic forceps do not have a wedge-shaped projection, but parallel
grooves. This type of forceps is used to aid in the suturing of thewound, as
well as grasping small instruments, etc., during the surgical procedure.
Rongeur
Forceps
This instrument is
used during intraoral surgery as well as afterwards, to remove bone and sharp
bone spicules. The ends and sides of the sharp blades become narrow, so that
when the handles are pressed, they cut the bone found in between without
exerting particular pressure.There is a spring between the handles, which
restores the handles to their original position every time pressure is applied
for cutting bone. Themost practical rongeur in oral surgery is the Luer–
Friedmann, because its blades are both end-cutting and side-cutting.
Bone
File
This instrument has
two ends: one small end and another with a large surface. The cutting surface
is made up of many small parallel blades, which are set in such a way that only
pulling is effective. The bone file is used in oral surgery to smooth bone and
not to remove large pieces of bone.

Luer–Friedmann
rongeur forceps with side-cutting/end-cutting edge

Double-ended
bone file with small and large ends

Surgical mallet
and chisels. a Partsch monobevel chisel. b Lucas chisel with concave end. c Lambotte bibevel chisel
Chisel
and Mallet
Mallets are
instruments with heavy-weighted ends. The surfaces of the ends are made of lead
or of plastic so that some of the shock is absorbed when the mallet strikes the
chisel. The chisels used in oral surgery have different shapes and sizes. Their
cutting edges are concave, monobeveled or bibeveled. The bibevel chisel is used
for sectioning multi-rooted teeth.
Needle
Holders
Needle holders are used for suturing the wound. The Mayo–Hegar and
Mathieu needle holders are considered suitable for this purpose. The first type
looks similar to a hemostat and is preferred mainly for intraoral placement of
sutures. The hemostat and needle holder have the following differences:
·
The short
beaks of the hemostat are thinner and longer compared to those of the needle
holder.
·
On the
needle holder, the internal surface of the short beaks is grooved and
crosshatched, permitting a firmand stable grasp of the needle, while the short
beaks of the hemostat have parallel grooves which are perpendicular to the long
axis ofthe instrument.
·
The needle
holder can release the needle with simple pressure, because of the gap in the
last step of the locking handle, whereas the hemostat requires a special
maneuver, because it does not have that gap in the last step of the locking
handle.

Needle holders. a Mayo–Hegar needle holder. b Mathieu needle holder

Beak of the
needle holder grasps a suture needle. The needle holder’s beak face is
crosshatched, ensuring stability of the needle during tissue penetration

Correct position
of the fingers for holding the needle holder

Standard suture
scissors. bGoldman–Fox soft tissue scissors

a Blunt-nosed Metzenbaum soft tissue scissors. b Lagrange
soft tissue scissors
The correct way to
hold the needle holder is to place the thumb in one ring of the handle and the
ring finger in the other. The rest of the fingers are curved around the outside
of the rings, while the fingertip of the index finger is placed on the hinge or
a little further up, for better control of the instrument.
Scissors
Various types of scissors are used in oral surgery, depending on the
surgical procedure. They belong to the following categories: suture scissors
and soft tissue scissors. The most commonly used scissors for cutting sutures
have sharp cutting edges, while Goldman–Fox, Lagrange (which have slightly
upward curved blades), and Metzenbaum are used for soft tissue. Lagrange
scissors are narrow scissors with sharp blades and are mainly used for removing
excess gingival tissue, while theMetzenbaumare blunt-nosed scissors and
are suitable for dissecting and undermining the mucosa from the underlying soft
tissues. Scissors are held the same way as needle holders.

Correct way to
hold scissors

Towel clamps
Towel
Clamps
Towel clamps are
mainly used for fastening sterile towels and drapes placed on the patient’s
head and chest, as well as for securing the surgical suction tube and the tube
connected to the handpiece with the sterile drape covering the patient’s chest.

Farabeuf
retractors for retraction of the cheek and mucoperiosteal flap

Kocher–Langenbeck
retractors, used in the sameway as Farabeuf retractors

Minnesota
retractors for retraction of the cheek and tongue
Retractors
Retractors are used to
retract the cheeks and mucoperiosteal flap during the surgical procedure. The
most commonly used retractors are Farabeuf, Kocher–Langenbeck, and Minnesota
retractors. Tongue retractors may be used to retract the tongue medially away
from the surgical field, facilitating manipulations

Weider retractor
for retraction of tongue to the side during surgical procedure

Rubber bite
blocks for adults (a) and for children (b)

Side action
adjustable mouth props
Bite
Blocks and Mouth Props
These instruments
facilitate opening and keeping the mouth openwhen the surgical procedure
requires this for prolonged periods and when patients cannot fully cooperate
with the dentist. The types usually used are rubber bite block, and the side
action adjustable mouth prop.

a Fergusson suction tip with wire stylet used as
a cleaning instrument. b Disposable suction tip

a Special irrigation system for irrigating the
surgical field with a steady stream of saline solution. b Regular
plastic syringe used for the same purpose
Surgical
Suction
There are a variety of
designs and sizes of surgical suctions that are used for removing blood,
saliva, and saline solution from the surgical field. Certain types of surgical
suctions are designed so that they have several orifices, preventing injury to
soft tissues (greatest danger for sublingual mucosa) during the surgical
procedure. The standard surgical suction has a main orifice for suctioning and
only one smaller orifice on the handle, for the reasons mentioned above. This
orifice is usually covered when rapid suctioning of blood and saline solution
from the surgical field is required.
Irrigation
Instruments
Irrigating the
surgical field with saline solution during bone removal is necessary and a
plastic syringe or a special irrigation system with a steady stream of saline
solution may be used for this purpose. In the first case, the syringe used is
large, with a blunt needle that is angled (facilitating irrigation especially
in posterior areas) with its end cut off so that it does not damage soft
tissues. In the second case, the special irrigation system is directly connected
to the bottle of saline solution, with a small tube. A knob stops the flow of
solution.
Electrosurgical
Unit
This is an electrical
device, providing high-frequency radio waves for cauterization (hemostasis) of
the vessels and incision of tissues. Incising tissues with the help of
electricity is called electrosurgery. The main parts of the electrosurgical
unit are:
The active electrode,
to which the handpiece is usually connected. The end of the handpiece receives
a metallic electrosurgical tip for incision or an electrosurgical ball for
hemostasis. There are other designs of electrodes as well, such as loops and
needles, which may be used according to the needs of the surgical procedure.
The passive electrode,
or ground plate, which is a separate electrode connected to the metallic plate,
sized 30 - 20 cm. The metallic plate is placed in direct
contact with the naked skin of the patient and is necessary for his or her
safety.
Foot pedal. This
usually includes a separate switch for incising tissue and another one for
electrocoagulation (hemostasis). On certain units, the handle of the positive
cable controls this function.
Switches. The main
switches are: cauterization switch, voltage switch, switch for incising tissue,
and a mixed switch for cauterization and incision. The last switch is found
only on more modern units and is very useful, because the surgeon may
alternately incise and cauterize, so that turning the switch back and forth
from one function to the other is avoided. There are also small portable
electrosurgical units that are battery-operated and simple to use. They may be
disposable or used more than once, depending on the model.

Electrosurgical
unit with various handpieces
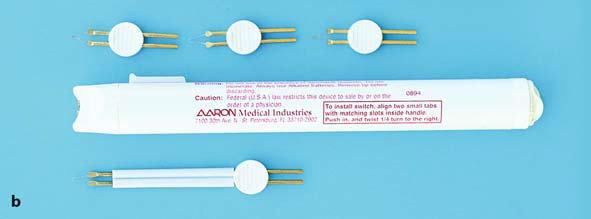

Portable
electrosurgical units. a Disposable. b Unit that may be used many times
Binocular
Loupes with Light Source
This system is comprised of binocular loupes, which may
be adapted to eyeglass frames or a headband, en- suring good vision of the surgical field. This system also has a light
source that projects intense light into difficult areas of the surgical field
(e.g., posterior teeth), where vision by means of standard lighting is not
satisfactory.

Binocular loupes
with light source, adapted to a headband

Binocular loupes
with light source, adapted to eyeglass frames

Maxillary
extraction forceps used for the six anterior teeth of the maxilla (superior and
side view)
Extraction
Forceps
The simple
intra-alveolar extraction is accomplished with the help of extraction forceps
and elevators. Each extraction forceps is composed of two parts, which are
crossed in such a way that they make up one instrument when used to extract a
tooth. The basic components of the extraction forceps are the handle, which is
above the hinge, and the beaks, which are below the hinge. The instrument is
held in the hand by the handle, upon which pressure is exerted during the
extraction. The beaks are the functional component of the forceps and grasp the
tooth at the cervical region and remove it fromthe alveolar socket. Because
tooth anatomy varies, extraction forceps with specially designed beaks have
been manufactured, so that they may be used for specific teeth. So, according
to the size and shape of the handles and beaks, the following types exist.
Maxillary
Extraction Forceps for the Six Anterior Teeth of the Maxilla.
Beaks that are found
on the same level as the handles characterize these forceps, and
the beaks are concave and not pointed.

Maxillary
universal forceps or no. 150 forceps (mainly used for upper premolars)

Maxillary right
molar forceps, for the first and second upper molars of the right side

Maxillary left
molar forceps, for the first and second upper molars of the left side
Maxillary Universal
Forceps or No. 150 Forceps.
The forceps used for
premolars have a slightly curved shape and look like an“S.” Holding the forceps
in the hand, the concave part of the curved part of the handle faces the
palm,while the concave part of the beaks is turned upwards. The ends of the
beaks of the forceps are concave and are not pointed. These forceps may also be
used for extraction of the six anterior teeth of the upper jaw.
Maxillary Molar
Forceps, for the First and Second Molar.
There are two of these
forceps: one for the left and one for the right side. Just like the
previouslymentioned forceps, they have a slightly curved shape that looks
like an “S” . The buccal beak of each
forceps has a pointed design, which fits into the buccal
bifurcation of the two buccal roots, while the palatal
beak is concave and fits into the convex surface of
the palatal root.

Maxillary third
molar forceps

Maxillary root
tip forceps
Maxillary Third
Molar Forceps.
These forceps have a
slightly curved shape, just like the aforementioned forceps, and are the
longest forceps, due to the posterior position of the third molar. Because this
tooth varies in shape and size, the beaks of the forceps are concave and smooth
(without pointed ends), so that these forceps may be used for extraction of
both the left and right thirdmolar of the upper jaw.
Maxillary Cowhorn
Molar Forceps.
The upper cowhorn
forceps are a variation of the maxillary molar forceps. The beaks of this type
of forceps have sharply pointed ends, which fit into the trifurcation of the
roots of the molars. They are primarily used for extraction of teeth with
severely decayed crowns, because when they are used to extract intact teeth,
they may fracture the buccal alveolar bone due to the large amount of force
they generate.
Maxillary Root Tip
Forceps.
The handles of the
root tip forceps are straight, while the beaks are narrow and angle-shaped. The
ends of the beaks are concave and without a pointed design.
Mandibular Forceps
for Anterior Teeth and Premolars or Mandibular Universal Forceps or No. 151 Forceps.
Unlike the maxillary
forceps, the beaks and handles of these forceps face the same direction,
creating an arch.When the forceps are held in the hand, the concave part of the
arch of the handles faces the palm, while the beaks obviously face downward.
The ends of the beaks are concave,withoutpointedends. The no. 151 forceps are
used for extraction of the six anterior teeth and the four premolars of the
lower jaw.
Mandibular Molar
Forceps.
These forceps are used
for both sides of the jaw and have straight handles while the beaks are curved
at approximately a right angle compared to the handles. Both beaks of the
forceps have pointed ends, which fit into the bifurcation of the roots buccally
and lingually. These forceps are used for the removal of both the first and
second molar of the right and left side of the lower jaw.


Mandibular molar
forceps

Mandibular third
molar forceps
Mandibular Third
Molar Forceps.
These forceps also
have straight handles, while the beaks, just like those of the first and second
molar forceps, are curved at a right angle compared to the handles. The beaks
are a little longer compared to the previous forceps, due to the posterior
position of the third molar in the dental arch. Because this tooth varies in
size and shape and because there is usually no root bifurcation, the ends of
the beaks of the forceps are concave without a pointed design.
Mandibular Cowhorn
Molar Forceps.
The lower cow horn
forceps or no. 23 forceps are a variation of the mandibular molar forceps. In
comparison to the standard forceps, the beaks have a semicircular shape with
sharply pointed ends so that they can fit into the bifurcation of the roots and
firmly grasp the tooth. Owing to the function of these forceps, tooth
extraction may be achieved quite easily as long as the roots are not curved.
With the beaks of the forceps grasping the crown of the molar and the

Mandibular
cowhorn molar forceps for sectioning roots. They are used for extracting molars
with intact crowns, and also when only sectioning of roots is necessary

Mandibular
cowhorn forceps adapted to molars

English-style
forceps with the hinge in the vertical direction
sharp ends fitting
into the root bifurcation, the surgeon squeezes the handles and, using small
buccolingual movements, slides the tooth out of the socket. Also, the cowhorn
forceps are very useful for sectioning roots of posterior teeth in the lower
jaw, when their crowns are severely decayed. After grasping the roots, the
teeth are easily sectioned after applying pressure at the bifurcation point.
Vertical Hinge
Forceps.
These English-style
forceps differ from the aforementioned forceps in that their hinges have a
vertical direction. Their use is limited, because large amounts of force can be
generated during extraction with this type of forceps, so that if the bone is
not elastic, there is increased risk of fracture of the alveolar bone.

Mandibular root
tip forceps
Mandibular Root
Tip Forceps.
The handles of the root
tip forceps are straight,while the beaks are curved at a right angle. Their
ends are very narrow and meet at the tip when the forceps are closed.
Elevators
The elevator is the
second most important instrument (after the extraction forceps) with which
tooth extraction is achieved or aided. It is composed of three parts: the
handle, the shank, and the blade. The shape of blade differs for each elevator
type, and each is used as the need dictates. There are three main types of
elevators used today in oral surgery: the straight elevator, the pair of
elevators with T-shaped or crossbar handles, and the pair of double-angled
elevators.
Straight Elevator.
This is the most
commonly used type of elevator for the removal of teeth and roots, in both the upper
and lower jaws. As already mentioned, the elevator’s components are the handle,
shank, and blade. The handle is pear-shaped, and big enough to be held
comfortably in the hand for the surgeon to apply pressure to the tooth to be
luxated. The shank is narrow and long and connects the handle to the blade. The
blade has two surfaces: a convex and a concave one. The concave surface is
placed buccally, either perpendicular to the tooth or at an angle, and always
in contact with the tooth to be luxated. The elevator is held in the dominant
hand, and the index finger is placed along the blade almost reaching its end.
The end of the blade is left exposed and is seated between the socket and the
tooth to be luxated.
Pair of Elevators
with T-shaped or Crossbar Handles.
This type of
elevator is used only in the lower jaw
for removal of a root of a molar, after the other root has already been removed
with the straight elevator. Each of these elevators is composed of the handle,
shank, and blade. The shank is connected to themiddle of the handle, giving the
elevator a T-shaped appearance, while the connection of the shank to the blade
is angled, and the blade end is sharp-tipped. The blades on this pair of
elevators face in opposite directions, and the appropriate one is used
according to the root that has to be removed. One elevator is used to remove
the mesial root, and the other for the distal root, for each side of the lower
jaw. Angled Seldin elevators are a variation of the elevators with T-shaped
handles.
In certain cases, the
T-shaped elevator may be used to remove a whole thirdmolar of the lower jaw.
The tip of the elevator is placed into the root bifurcation buccal to the
tooth, using the external oblique ridge as a fulcrum.
Pair of
Double-Angled Elevators.
Double-angled
elevators are mainly used to remove root tips in both jaws. They are also very
useful instruments for the extraction of impacted third molars of the upper jaw.
Their handle is similar to that of the straight elevator. The shank has a
double angle, so that the instrument may enter the socket, and the two
elevators face in opposite directions. The blade has a convex and concave
surface, ending in a sharp point. There are also double-angled elevators with
narrow blades and very sharp ends, which may easily remove small broken root
tips.

Straight Bein
elevator

StraightWhite
elevator with slightly curved blade, suitable for extracting posterior
maxillary teeth

Pair of
elevators with crossbar or T-shaped handles

Pair of angled
Seldin elevators suitable for extracting roots in the mandible

Pair of
double-angled elevators

Chompret
elevators; a straight, and b curved

Sharp-tipped
angled elevators suitable for removal of root tips
Other
Types of Elevators
Straight Chompret
Elevator.
The narrow blade of this
instrument means that this type of elevator may also be used as a straight
elevator. The straight Chompret elevator may only be used this way when the
width of the straight elevator blade prevents its correct placement for the
luxation of the tooth or root.
Curved Chompret
Elevator and Doubleangled Elevators with Narrow Blades and
Sharp Tipped Ends.
These instruments are
used by the dentist as the need dictates.

a Special instrument for removing roots belowthe
margin of alveolar bone. b Bur for widening the root canal

Periapical
curettes with ends of different sizes

Desmotomes. a Straight. b Curved
Special
Instrument for Removal of Roots
The instrument in is
used to remove broken roots found below the alveolar crest. The spiral end of the
instrument is placed inside the extraction socket, and, after screwing the
instrument into the root canal of the broken root, traction is used to remove
the root from the socket.
Periapical Curettes
These are angled
double-ended, spoon-shaped instruments. The most commonly such used instrument is
the periapical curette, whose shape facilitates its entry into bone defects and
extraction sockets. The main use of this instrument is the removal of granulation
tissue, small cysts, bone chips, foreign bodies, etc.
Desmotomes
These instruments are
used to sever the soft tissue attachment, and are either straight or curved.
The straight desmotome is used for the anterior teeth of the upper jawand the
curved desmotome for the rest of the teeth of the upper jaw as well as all of
the teeth of the lower jaw.

Set of instruments
necessary for simple tooth extraction

Set of
instruments necessary for surgical tooth extraction
Sets
of Necessary Instruments
For practical reasons,
sterilized and packaged full sets of instruments for the most common surgical
procedures must always be available. These sets include:
a. Set for simple
tooth extraction:
1. Local anesthesia
syringe, needle, and ampule.
2. Desmotome or Freer
elevator.
3. Retractor or mouth
mirror.
4. Extraction forceps
(depending on the
tooth to be removed).
5. Surgical or
anatomic forceps.
6. Elevators.
7. Sterile gauze.
8. Periapical curette.
9. Suction tip.
10. Towel clamp.
11. Needle holder.
b. Set for surgical
tooth extraction:
1. Local anesthesia
syringe, needle, and ampule.
2. Scalpel and blade.
3. Periosteal
elevators.
4. Elevators.
5. Bone chisel.
6. Mallet.
7. Rongeur forceps.
8. Bone file.
9. Periapical curette.
10. Bone burs.
11. Hemostat

Set of
instruments necessary for soft tissue specimen sampling by biopsy

Set of instruments
necessary for incision and drainage of abscesses
12. Retractors.
13. Needle holder.
14. Surgical forceps
and anatomic forceps.
15. Scissors.
16. Towel clamps.
17. Disposable plastic
syringe.
18. Suction tip.
19. Straight
handpiece.
20. Bowl for saline
solution.
21. Sutures.
22. Sterile gauze.
c. Set of instruments
for surgical biopsy (bone and soft tissue) :
1. Local anesthesia
syringe, needle, and ampule.
2. Scalpel and blade.
3. Periosteal
elevator.
4. Scissors.
5. Surgical forceps
and anatomic forceps.
6. Periapical curette.
7. Needle holder.
8. Hemostats.
9. Rongeur forceps.
10. Towel clamps.
11. Suction tip.
12. Sutures.
13. Sterile gauze.
14. Retractors.
d. Set of instruments
for incision and drainage of abscess :
1. Local anesthesia
syringe, needle, and ampule.
2. Scalpel and blade.
3. Hemostats.
4. Surgical and
anatomic forceps.
5. Scissors.
6. Needle holder.
7. Suction tip.
8. Towel clamps.
9. Sutures.
10. Sterilized Penrose
rubber drain 1/4 in.
11. Sterile gauze.


Different types
of resorbable sutures made fromgut tissue and synthetic material
Sutures
Great progress in sutures has been made since 1865, when disinfection
and sterilization first started being used in surgery. There is a big variety
in the size of surgical sutures
available today, and two basic categories: (1) resorbable, and (2)
nonresorbable sutures.
Resorbable Sutures.
These sutures are
resorbed after a certain time, which usually coincideswith healing of the
wound. These sutures are made of gut or vital tissue (catgut, collagen, fascia,
etc.) and are plain or chromic, or of synthetic material, e.g., polyglycolic
acid (Dexon) . Plain catgut sutures are resorbed postsurgically over 8 days,
chromic sutures in 12– 15 days,and synthetic (Dexon) sutures in approximately 30days.
These types of sutures are used for flaps with little tension, children,
mentally handicapped patients, and generally for patients who cannot return to
the clinic to have the sutures removed.
Nonresorbable
Sutures.
These sutures remain
in the tissues and are not resorbed, but have to be cut and removed about 7
days after their placement. They are fabricated of various natural materials,
mainly surgical silk (monofilamentous or multifilamentous, in many diameters
and lengths) and surgical cotton suture. Silk sutures are the easiest to use
and the most economical, and have a satisfactory ability to hold a knot. The
most commonly used suture sizes are 4–0 and 3–0 for resorbable sutures, and 3–0
and 2–0 for nonresorbable sutures. These kinds of sutures are sold in sterilized
packages with pre-attached atraumatic needles or in bundles without needles.

Nonresorbable
surgical sutures made of silk

Cross-sectional
view of needles. a Round tapered (1), oval
tapered (2), cutting (3, triangular
with one of the three cutting edges on the inside of the semicircle), reverse-cutting
(4, triangular with two cutting edges on the inside
of the semi-circle). b Size of needle compared to regular circle:
one-quarter of a circle (1), three-eighths of a circle (2), half a
circle (3), three-quarters of a circle (4)
Needles
A variety of needles
are available in oral surgery, and they may differ in shape, diameter,
cross-sectional view, and size. They are usually made of stainless steel, which
is a strong and flexible material. The needles preferred by surgeons today are atraumatic disposable needles with
pre-attached sutures on their posterior ends. Needles
that may be used and sterilized
many times are also available, with an eye or groove in the needle, through which
the suture is passed.
Needles with Round
or Oval Cross-Sectional View.
These are considered
atraumatic and are mainly used for suturing thin mucosa. Their disadvantage is
that great pressure is required when passing through the tissues, which may
make suturing the wound harder.
Triangular Needles.
These needles have
sharp cutting edges and are preferred for suturing thicker tissues. When
they are used for thin mucosa, care is required because they may tear
the tissues. The most suitable needles are semicircular or three-eighths
of a circle and 19–20mmlong, in both cases.
Local
Hemostatic Drugs
These drugs are
suitable only for local use and can stop heavy bleeding, which is due to injury
of capillaries or arterioles. The main hemostatic drugs are listed below.
Alginic Acid. This is sold in powder form in special 5-mg
packages. It is placed on the bleeding surface, creating a protective membrane
that applies pressure to the capillaries and helps hold the blood clot in
place.
Natural Collagen
Sponge. This is a white sponge
material, non antigenic and fully absorbable. Its hemostatic ability is due to
promotion of platelet aggregation. Also, it activates coagulation factors XI and
XIII. It is used for patients who are prone to hemorrhage after dental surgical
procedures.

Hemostatic
powder suitable for stopping capillary bleeding

Absorbable
hemostatic natural collagen sponges. These are indicated in cases of
postextraction bleeding
Fibrin Sponge. The fibrin sponge is nonantigenic, and is
prepared from bovine material that has been processed in order to avoid allergic
reactions. It is used locally in the bleeding area and especially in the postextraction
socket. It promotes coagulation, creating a normal hemostatic blood clot, but
it also functions as a plug over the edges of the bleeding area. The fibrin
sponge is fully absorbed by the tissues within 4–6 weeks.
Gelatin Sponge. This is a relatively spongy material, nonantigenic
and fully absorbable. Its hemostatic action and application are the same as
that of the fibrin sponge.
Oxidized
Cellulose. This is an
absorbable hemostatic material, which is manufactured by controlled oxidation of
cellulose by nitrous dioxide. It is available in gauze form or pellet form
(Fig. 4.67). It is used topically as a hemostatic material, because it releases
cytotoxic acid, which has significant affinity for hemoglobin. Its attachment
to the walls of the postextraction socket for the treatment of bleeding is
quite satisfactory and therefore it is considered superior to various other
hemostatic sponges, which have a tendency to expel thematerial from the socket.
Bone Wax. Bone wax is a sterilized, nonabsorbable mix of waxes, and is composed of
white beeswax, paraffin wax, and an isopropyl ester of palmitic acid It
is white and available as a solid rectangular plate weighing 2.5 g. It is used
to control bleeding that originates in bone or chipped edges of bone. Before its
application, bone wax is first warmed with the fingers, so that the desirable
consistency is reached. Its hemostatic action is brought about through
mechanical obstruction of the osseous cavity, which contains the bleeding
vessels.

Gelatin sponges.
These are used to treat postextraction bleeding

Oxidized
cellulose in pellet form

Surgical bone
wax for treatment of bone hemorrhage

Petrolatum
(VaselineR) gauze in a sterile container
Materials
for Covering or Filling a Surgical Wound
Petrolatum Gauze.
Petrolatum (VaselineR) gauze is available in sterilized packages and
is used mainly for covering exposed wounds, for tamponade of bone cavities after
marsupialization of cysts, for surgical procedures in themaxillary sinus, etc.
Before its application, the excess petrolatummust be removed and the gauze saturated
with antibiotic ointment (oxytetracycline), if deemed necessary.
Iodoform Gauze.
This gauze has
antiseptic, analgesic and hemostatic properties. Its indications for use are the
same as for petrolatum gauze, although it may remain in place for longer. The
iodoform gauze is also available in small-sized packages, for the treatment of
dry socket.
Surgical Dressing.
This is an
autopolymerized puttylike paste, available in sterilized packaging. It is used in
periodontology and oral surgery as a temporary protective covering of intraoral
wounds after surgical procedures.

Clinical
photograph showing closure of the operative field with surgical dressing
Materials
for Tissue Regeneration
Sometimes during
surgical procedures (removal of cysts, extraction of impacted teeth, etc.)
large bony defects are created, which cause problems associated with esthetics,
function, and the healing process, or They may even affect the stability of the
jaw bone. Recently, application of a variety of materials in oral surgery to
the area around these bony defects aids bone regeneration and eliminates the
defect or limits its size. These materials may also prove useful in the
regeneration of periodontal tissues, for the filling of bone defects around an
implant, or for augmentation of a deficient alveolar ridge, etc. The most
commonly used such materials are membranes and bone grafts.
Membranes. These may be absorbable or non absorbable. Synthetic
polymer and collagen membranes are absorbable. Non absorbable membranes include
those reinforced with titanium, aswell asmetallic titanium network membranes.
The main disadvantage of non absorbable membranes is the need to perform a
second surgical procedure for their removal.
Bone Grafts. These belong to four categories:
1. Autografts, which are
composed of tissues from the actual patient.
2. Allografts, which
are composed of tissues from another individual.
3. Heterografts, which
are composed of tissues from various animals.
4. Alloplastic grafts,
which are composed of synthetic bone substitutes, e.g., hydroxylapatite, phosphoric
calcium ceramics, and oily calcium


a Absorbable collagen membrane used for guided
bone regeneration. b Clinical photograph showing stabilization of
the membrane in an area of bone deficit after surgical extraction

Heterografts of
bovine bone (Bio-Oss) for the regeneration of large osseous defects; a in compact form, and b in granules


a Synthetic bone substitute (hydroxylapatite) in
granules. b Clinical photograph of transplantation of lateral
incisor of the maxilla. The area of osseous defect is filled with
hydroxylapatite
Amelogenin (base
and catalyst) used for tissue regeneration


a Oily calciumhydroxide in creamformused for bone
regeneration. b Postextraction socket with buccal loss of bone.
The area is filled with synthetic material
Other materials that
contain amelogenin as the active ingredient, amelogenin being one of the
proteins associated with tooth enamel, may also promote tissue regeneration. Of
all the grafts, bone autografts give the best results. In spite of that, their
use of limited, because a second concurrent surgical procedure is required. For
this reason, the aforementioned synthetic substitute materials are used today
instead, and bone regeneration in areas with large bone defects is accomplished
satisfactorily.


